Production modepseudonymizedA public survey link lets anyone answer one of your ePRO questionnaires without being invited individually and without an existing patient record. As soon as a respondent starts the questionnaire, a new patient record is created automatically in your series. This is what you need to collect data in open recruitment: a QR code on a conference poster, a link in a newsletter, or a poster in a waiting room.
You can create several public links for the same questionnaire, each with its own name and its own patient count, so you can tell which channel brought in which patients.
Who can create a public link?
Only users who meet both of the following conditions can create and manage public links:
- The series has e-PRO enabled. No additional plan or dedicated permission is required.
- They have the permission to configure questionnaires in the series.
Where to find public links?
- Go to the menu Variables > Questionnaires
- Open the questionnaire you want to share, or create a new one
- In the configuration wizard, click on the Public link tab, located between Scheduling and Emails
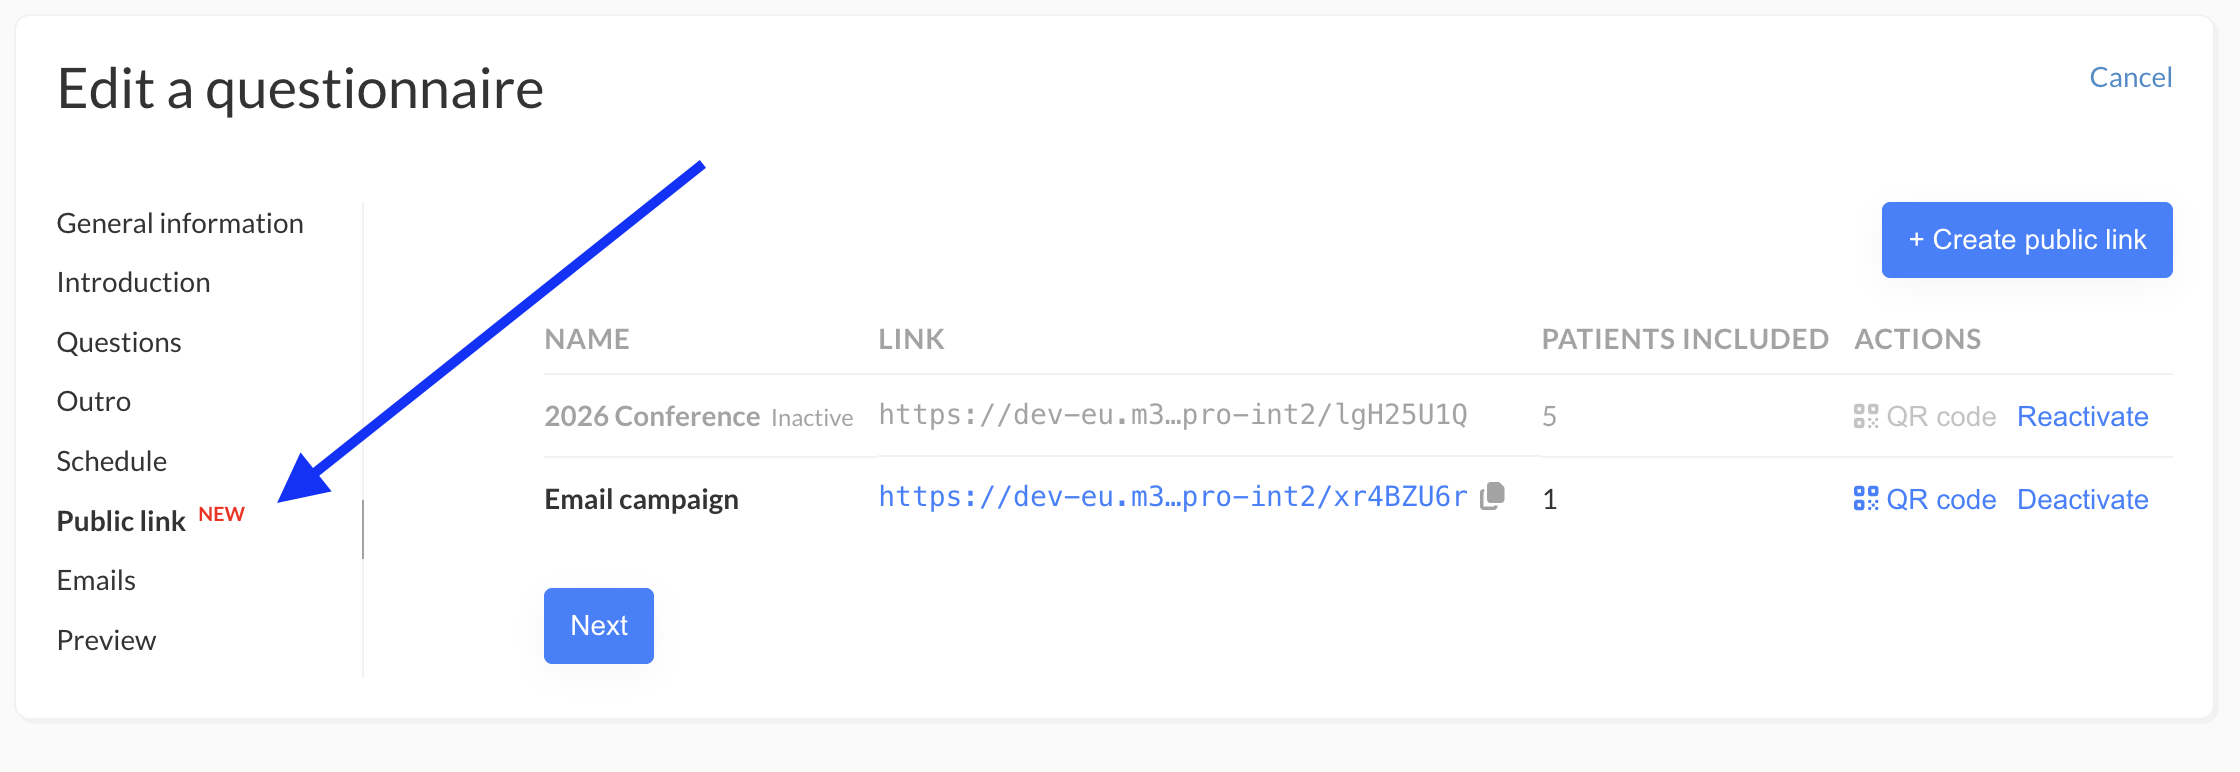
Step-by-step: Creating and sharing a public link
1. Create your first link
If the questionnaire has no public link yet, the tab shows a short explanation and a single button, + Create your first public link. Click it to open the creation form.
2. Name the link
A name is required. Give each link a name that identifies where you are going to publish it, so you can read the results later without guessing:
Cardiology waiting room posterOctober congress QR codePatient association newsletter
If you leave the field untouched, the link is named Public Link by default. Renaming it later is possible, but the name is what you will see on every patient record created through it, so it is worth setting properly from the start.
3. Copy and share the URL
Each link gets its own permanent URL, shown in the links table. Click the copy icon on the row to copy it, then publish it wherever you need — an email, a website, a printed poster, or a QR code generated from that URL.
The URL does not change over time and does not expire.
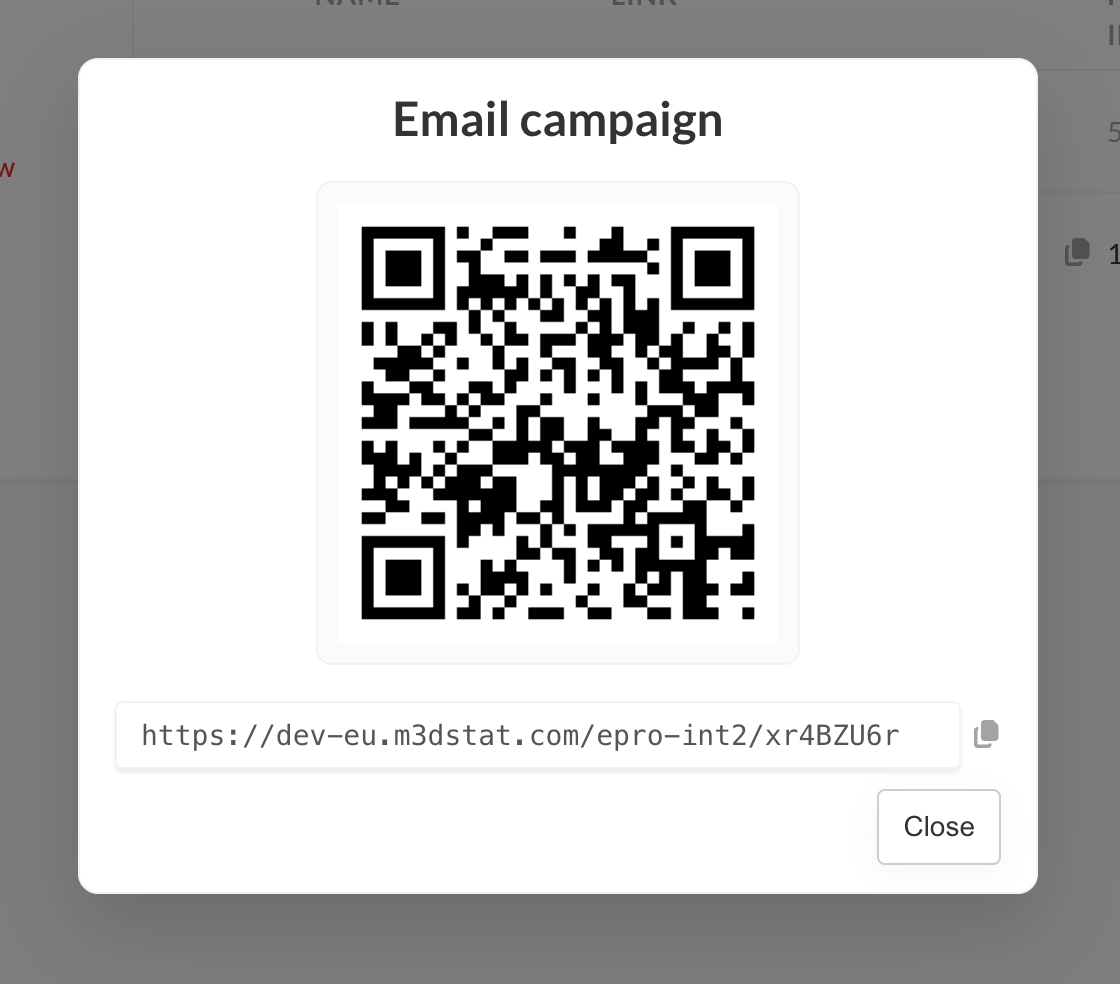
4. Create one link per channel
To measure your channels separately, create a separate link for each one rather than reusing a single URL. Every link works independently:
- Its own name
- Its own permanent URL
- Its own count of patients created through it
The patient count on each row is read-only and updates as respondents start the questionnaire.
5. Check what respondents will see
Before publishing, open the link yourself to check the experience.
If your series collects identity information — first name, last name, birth date, email address, or gender — the respondent is asked to fill in exactly those fields on a single screen, translated into their language, before reaching the first question. If your series collects none of them, respondents go straight to the questionnaire. If collected, first name, last name and birth date will be pseudonymized, just like in the eCRF.
The consent message and checkbox shown on the first page are the same ones used by all your other questionnaires.
Step-by-step: Deactivating and reactivating a link
1. Deactivate a link you no longer want to use
On the row of an active link, click Deactivate. A confirmation message appears, because the effect is immediate:
- The link stops working straight away for anyone who opens it
- Patient records already created through it are not affected in any way
- The link can be reactivated at any time
Once deactivated, the row is greyed out and the copy icon is removed, so the URL cannot be shared by mistake.
2. Reactivate it when you need it again
Click Reactivate on the row. The link starts working again immediately, with no confirmation step. Its URL and its patient count are unchanged.
This is useful for a link tied to a recurring event: deactivate it after the conference, reactivate it next year rather than creating a new one and splitting your counts across two links.
How to recognise a patient who came through a link?
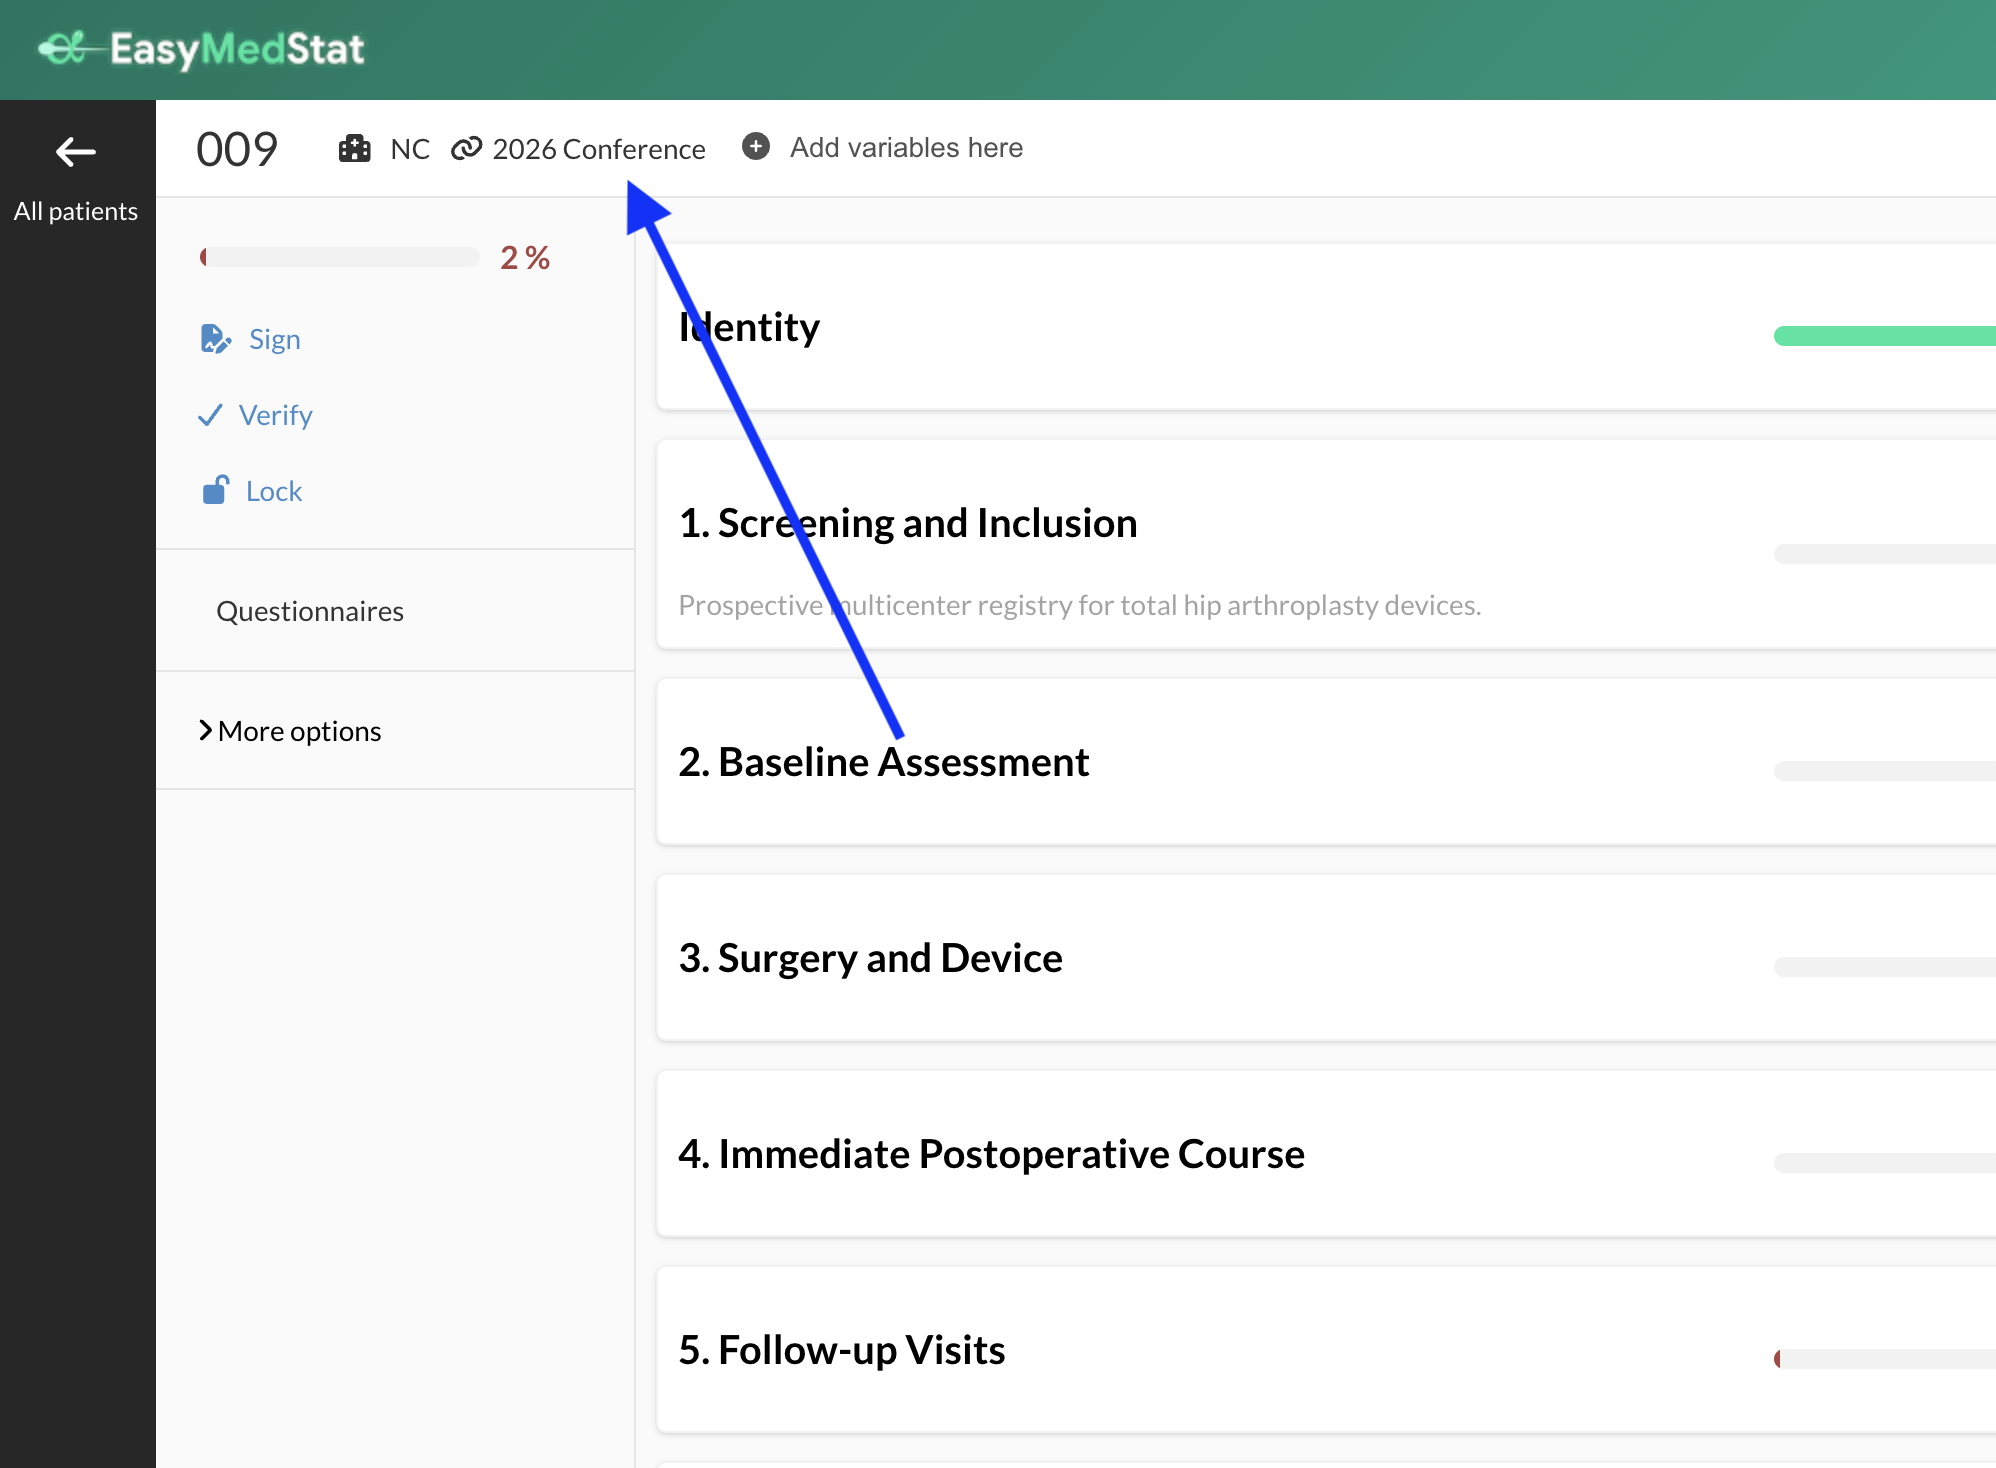
On the record of a patient created through a public link, the patient header shows a link icon followed by the name of the link they came through, next to the site badge. A patient created through a standard individual invitation shows no such badge.
Notes
- Public links coexist with your usual individual invitations on the same questionnaire. You do not have to choose one method.
- The patient record is created as soon as the respondent reaches the first question, not when they submit. An abandoned questionnaire therefore leaves a partially completed record in your series.
- There is no automatic duplicate detection. Every opening of a link creates a separate patient record, including when the same person refreshes the page or answers twice. Plan a duplicate check on the data you collect, as you would for any open collection.
- Pausing the questionnaire stops new responses through all of its public links at once. To stop a single link, deactivate that link.
- Patient counts are read-only and are not clickable. Filtering or searching your patient list by public link is not available.
- Patients counts are reset when going to Production mode when the option to delete all test patients is checked
- In a multicentric series, the site is left unanswered on patients created through a link, unless you add the site as a question in the questionnaire itself.
- Public links cannot be created or managed through the API.
Was this article helpful?
That’s Great!
Thank you for your feedback
Sorry! We couldn't be helpful
Thank you for your feedback
Feedback sent
We appreciate your effort and will try to fix the article